5 DIY Methods for Shiny, Silky Hair (Without Breaking the Bank)
Whether you’re walking into that big job interview, headed out for your BFF’s birthday night out, or just angling a selfie after finding your perfect light – we need our hair to show up with as much life, luster, and shine as we do! Nothing kills a look faster than stale, dry locks– but don’t let that stop you from living your best life!

Whether you’re walking into that big job interview, headed out for your BFF’s birthday night out, or just angling a selfie after finding your perfect light – we need our hair to show up with as much life, luster, and shine as we do! Nothing kills a look faster than stale, dry locks– but don’t let that stop you from living your best life! These five budget friendly DIY tips for shiny hair reign supreme. #nobadhairdays Dive into these DIY tactics for budget friendly remedies, and kick your hair health into high gear!
Here are the silky smooth methods we'll cover:
Hair Dusting
Who says you have to cut your hair to get rid of dead ends and tame frizzy hair? How about a method where you don't have to cut off even an inch of your hair length but still get rid of unhealthy, damaged, and frizzy ends? And you can do it by yourself at home. Say hello to hair dusting.
What Is Hair Dusting?
Hair dusting is a hair care technique where you remove damaged ends from the bottom of each hair strand by shipping them with the help of hair-cut scissors. This way, you get to keep the hair length untouched – especially for those who don't want to shorten it – while handling flyaways of frizzy hair tips.
How to Hair Dust
This method will get aid to tame those pesky frizzy split ends and will leave you with silky, healthy hair.
- Dry Your Hair: Whatever hair texture you have, just make sure your hair is dried. Blow drying or air drying both work!
- Section Your Hair Strands: Working on a small chunk of hair is the easier way to keep track of the parts you've worked on. Pull the rest of your hair back in a clip to hold them until you’re ready for those strands.
- Stretch The Hair Tip/Curl: Once you've gotten hold of a section of the hair strands you want to cut, wrap that section around your fingers, until you see the little broken pieces pointing out. You’ll want to hold the end tight - that will make it easier to see the split ends and prevent you from cutting healthy hair. You can twist the strand too if that’s easier for you!
- Snip Away: Once you’ve located your split ends, start snipping! You’ll only need to cut a little off (less than a quarter inch).
- Repeat Process: Keep sectioning some strands together, curl them around your fingers, and then snip! Repeat. Cut carefully, however. You want to make sure you don't cut up to an inch, else you'll leave your hair shorter or uneven. And yeah, that's a no-no!
Hair Towel for Drying
Seeking out a towel that’s specifically designed for drying hair can do wonders for shiny hair results. Your regular bath towel might actually be damaging your hair; they are great for drying your body – and that's just about it. The high fiber in your regular bath towel tends to feast on your natural hair, causing frequent frizz and breakage.
Using a hair specific towel made from less damaging materials can ensure your post-shower drying sessions aren’t also stripping hair of vital properties. If you’re looking for super duper DIY, you can wrap your wet hair with a cotton t-shirt for this method and that will help reduce frizz a bit.
If you’re looking for something with a little more pizazz, there are actual hair towels that are specifically designed for hair treatment. What sets them apart is the type of fabric used, which is a microfiber that has higher absorbency and fibers that prevent/get rid of frizz and halt breakage. These types of hair towels are clinically proven to strengthen hair and an added bonus is it dries 50% faster than a traditional towel.
How Do You Use Hair Towels
Most hair towels make it super easy to use! You can use it straight out of the shower, all you need to do is wrap your hair in the towel and twist. Secure on the top of the head and you can even tuck the towel at the back of your neck where the towel is tight. And viola! Leave it on for about 10-20 minutes, or until you’re done scrolling through social media (we’ve all fallen down that rabbit hole), and you’re ready to style!
Silk Pillowcases
Have you considered the idea of hair treatment while you sleep? You go to bed and boom! You wake up with healthier, and more beautiful hair than last night. Research has shown that the pillowcase you're using right now could be a serious culprit behind those bad hair days. If you want to prevent frizzy hair and even face wrinkles, then you should consider using silk pillowcases. Silk pillowcases unfortunately don’t solve all beauty bummers, but they might be able to help prevent some frizziness. So cheers to a softer, frizz-free, healthier hair.
Why Silk Pillowcases Work
A silk pillowcase works because it's super smooth which means less friction for your hair and face. No friction = no snags or tangles which can lead to frizzy, unruly hair. Sleeping on silk is especially great for anyone with protective styles that want to ride the smooth train for a while.
PS: Although there are numerous benefits from silk pillows, beware of unrealistic claims by shady silk pillow manufacturers. Finding a high-quality silk pillowcase is crucial to getting DIY soft hair.

DIY Hair Mask for Shiny Hair
Numerous things can damage your hair – some of which you can control, some of which you cannot. Factors like weather, UV rays and ocean water, hair dyes, or overuse of heat tools, can cause hair damage. A super doable approach to counteract these damaging effects is to make your own hair mask on the reg! There are tons of DIY hair mask recipes online and we took the liberty of putting a few together here for you. We got you.
- Coconut oil, Mayonnaise, Yogurt
The Ingredients
- 2 tablespoons of full-fat yogurt
- ½ cup of mayonnaise
- 2 tablespoons of coconut oil
DIY Directions
- To get the best out of this mask, use our Gussi Protection Plan Plan Upkeep Shampoo to wash your hair and unclog your cuticles.
- Then start applying the mask mixture all over your wet hair, using your fingers to thoroughly rake it back and forth and down from root to tipl.
- Once you've thoroughly done the mixing, leave it for 50-60 minutes and let it work its magic.
- Finally, rinse your hair with shampoo, and finish the hair off with our Protection Plan Upkeep Conditioner for an extra shot of smoothness and shine.
There are other DIY Hair Mask Recipes that can help with different problem areas:
- Shine and Hydration: Avocado, Manuka honey, Olive Oil
- Hair Breakage Repair: Greek Yogurt, Castor Oil, Egg, Coconut Oil
- Dandruff, Frizz, and Scalp Health: Apple Cider Rinse and Tea Tree Oil
For even more DIY hair mask recipes and see how they are used, check here.

The Gussi At-Home Keratin Treatment
Last but certainly not least! Above all DIY methods out there, the best and most long-lasting solution to getting rid of frizzy hair, making your hair soft and silky, and repairing dry and damaged strands is using a keratin treatment. You can go to a salon to get a keratin treatment, but that wouldn't be DIY or budget friendly, now would it?
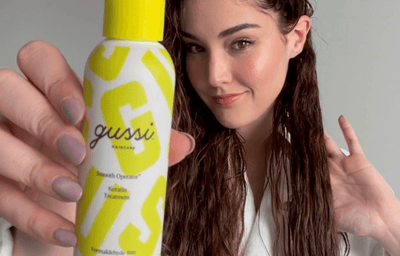
That’s where we come in with the Gussi At-Home Keratin Treatment Kit. Step aside expensive and damaging salon-treatments, we’re the first-ever at-home keratin treatment and we’re formaldehyde free, YAY! With Gussi, you can infuse proteins and oils, make hair softer, smoother, and stronger and keep it in a no-frizzy-fussy state for up to a whopping six weeks. The best part? This DIY method is very cost-effective compared to using a salon keratin treatment.
With only $65 you can get everything you need to fly first class to the land of smooth. And with just one treatment, you get up to six weeks of nourished and moisturized frizz-free hair. Talk about saving money, saving time, and saving hair.
How to Use an At-Home Keratin Treatment
Well, it’s as easy as 1,2,3…4,5…seriously!
- Wash hair thoroughly, twice, with our priming shampoo (it’s included in the kit!).
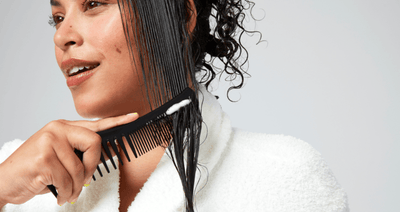
- Divide hair into sections and fully saturate hair with the treatment, brushing through each strand with a comb. Once you’ve completely saturated your whole head of hair, let the treatment process for 15-30 minutes.
- Rinse hair lightly (only about 30 seconds). There should still be some treatment in your hair when you’re done with this step! That’s how the magic works.
- Dry hair completely with a blow dryer. This is key, hair must be 100% dry to proceed!
- Lock in the treatment by going over your hair strands with a straightener.
For more in-depth instructions, visit our DIY keratin how-to page where we explain different hot tips based on your hair type.